Potty Training Starter Checklist: Week-1 Plan + Charts
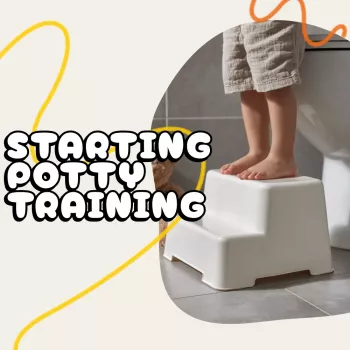
Starting Potty Training Checklist: A Calm, Step-by-Step Guide With Charts, Routines, and Simple AI Prompts
Potty training tends to feel easier when the basics stay predictable: clear readiness signals, a simple setup, and a repeatable routine every caregiver follows. This guide walks through a practical starting checklist, a gentle first-week plan, and easy ways to track progress with a potty chart and routine tracker—so toddlers get consistency and caregivers get clarity.
Before You Start: Readiness Signals That Matter Most
Readiness usually shows up as a cluster of patterns, not a single milestone. Many toddlers begin between 18–36 months, but timing works best when the child’s body and behavior are lining up. The American Academy of Pediatrics and Mayo Clinic both emphasize readiness and a calm approach over rigid timelines (see HealthyChildren.org and Mayo Clinic).
- Look for patterns rather than one sign: staying dry longer, bathroom curiosity, or discomfort with dirty diapers.
- Communication can be words, signs, or gestures—the key is a reliable way to signal “go.”
- Body readiness: can sit briefly, pull pants up/down with help, and follow a simple one-step direction.
- Emotional readiness: tolerates small transitions, accepts help, and bounces back after frustration.
- Timing check: avoid starting during major changes (new sibling, travel, illness, moving, childcare switch) when possible.
- Set a realistic goal: familiarity first; independence builds over weeks, not days.
Quick Readiness & Setup Checklist
| Category | Checklist item | Notes to decide |
|---|---|---|
| Readiness | Dry for 1–2 hours at a time | Indicates bladder capacity is developing |
| Readiness | Shows interest in toilet/bathroom routines | Watches caregivers, asks questions, wants to flush |
| Readiness | Can signal needs (words/signs/gestures) | Any consistent cue works |
| Supplies | Child potty or toilet seat + stable step stool | Feet supported helps relaxation |
| Supplies | Training pants/underwear + extra clothing | Plan 3–5 changes/day at first |
| Routine | Predictable potty “check-ins” scheduled | After waking, meals, before leaving home, before bed |
| Support | Caregiver agreement on words and approach | Same cues, same expectations, same calm response |
Set Up the Environment for Easy Success
A calm environment reduces hesitation and helps toddlers relax their bodies (a surprisingly big part of success). Aim for an easy “yes” path: simple clothing, predictable placement, and supplies you can grab quickly.
- Choose the setup that reduces fear: a floor potty for quick access or a toilet seat with a sturdy step stool for stability.
- Keep supplies within reach: wipes, spare clothes, a small trash bag, soap, and a stool for handwashing independence.
- Create a “bathroom path”: clear route, easy-to-remove bottoms, and a consistent place for the potty/seat.
- Use consistent language (short and neutral): “Potty time,” “Pee goes in the potty,” “Try, then all done.”
- Plan quick-clean solutions: washable covers, enzyme cleaner for accidents, and a calm reset routine.
The First Week Plan: Short Sessions, Frequent Wins
Early days work best when the goal is learning the routine, not chasing perfection. Keep sits brief, keep your tone steady, and treat every attempt as practice.
- Day 1–2 focus: learning the routine (sit, try, wipe, flush, wash hands), not perfection.
- Start with high-probability times: right after waking, after meals, before bath, before leaving the house.
- Use brief sits (30–60 seconds for beginners); end on success: “You tried—great job listening to your body.”
- Offer water with meals and snacks to create natural opportunities without pushing extra fluids.
- Keep outings simple early on: shorter trips, easy bathroom access, and a backup change of clothes.
- Track patterns (time of day + triggers) to reduce guesswork and improve timing over the week.
If frustration rises, scale back and protect connection. Positive parenting tools—clear boundaries, predictable routines, and calm follow-through—support learning during this stage (see CDC Positive Parenting Tips).
How to Use a Printable Checklist, Potty Chart, and Routine Tracker
Tracking is most helpful when it’s simple. You’re looking for trends (timing, self-initiation, common accident windows), not documenting every detail.
- Print one master checklist to guide setup (supplies, phrases, caregiver plan) and prevent mid-week scrambling.
- Place the potty chart at toddler eye level; mark immediately (sticker/check) to connect action to reward.
- Keep a routine tracker in the bathroom or on the fridge; log attempts and successes to identify patterns.
- Use simple categories: “Tried,” “Pee,” “Poop,” “Accident,” “Prompted,” “Self-initiated.” Avoid over-detailed notes.
- Review once daily (not after every miss) to stay calm and avoid turning training into constant evaluation.
- Use the same chart system across caregivers to maintain consistency.
Helpful downloads and cleanup support
- Starting Potty Training Checklist printable (digital download) ($2.99) for a ready-to-print checklist, potty chart, and routine tracker.
- Cordless Vacuum Cleaner, 235W Brushless Motor, 40Min Runtime ($155.49) for fast resets during the messier early weeks.
Gentle Motivation: Rewards, Praise, and What to Avoid
Motivation works best when it supports body awareness rather than pressure. Keep your message consistent: the potty is simply where pee and poop go.
Common Snags and Quick Fixes
Simple AI Prompts to Personalize a Routine (Without Overcomplicating It)
Printable Digital Download: What’s Included and How to Use It
Find it here: Starting Potty Training Checklist printable (digital download).
FAQ
What age should a toddler start potty training?
Readiness matters more than age, though many toddlers start between 18–36 months. Look for longer dry stretches, interest in bathroom routines, and a reliable way to communicate the need to go; check with a pediatrician if you have concerns about delays or discomfort.
How long does potty training usually take?
The first learning phase can take days to weeks, while steady independence often takes weeks to months. Consistent routines across caregivers usually matters more than trying to move faster.
What if my child is scared of the toilet?
Start with gradual exposure: a floor potty or a stable seat and step stool, short sits, and choices can reduce fear. Keep language neutral, avoid forced sitting, and consider waiting on flushing if the sound is upsetting.










Leave a comment